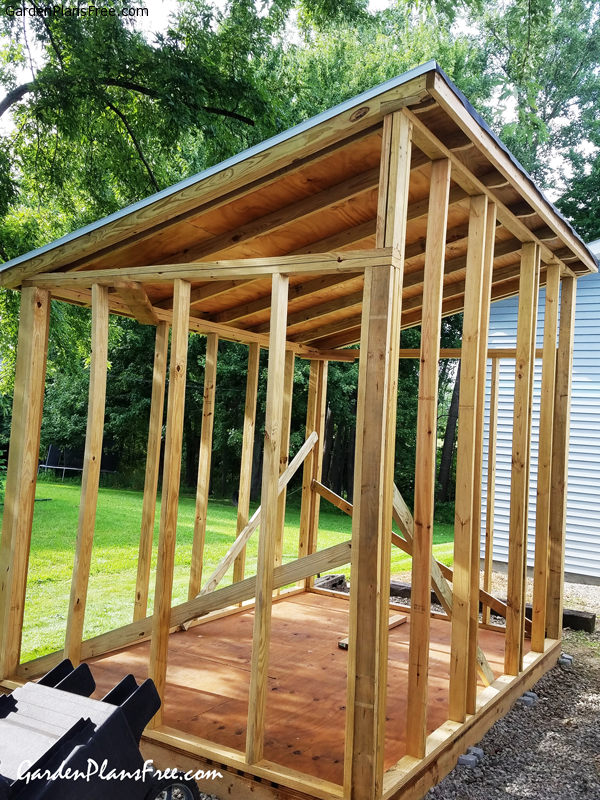
Alright, so you're tired of your stuff spilling out of the garage, or maybe you just want a cozy little spot to putter around in. Whatever your reason, you've decided on a lean-to shed. Good choice! They're versatile, easy to build, and surprisingly affordable. But we're not just talking about slapping together some plywood and calling it a day. We're talking about a lean-to shed that'll last you a lifetime, maybe even longer.
Let's break this down into bite-sized chunks:
Step 1: The Foundation - It's All About Stability
Think of your shed as a house for your stuff. You wouldn't want your house to sink, would you? Same goes for your shed. A solid foundation is key. Here's the deal:
Concrete is king: This is the most durable and long-lasting option. You'll need to dig a trench and pour concrete, but it's worth the effort. Make sure the concrete is level, and you'll have a foundation that'll handle anything Mother Nature throws at it.
Pressure-treated lumber is a close second: If you're not into concrete, pressure-treated lumber is a great alternative. It's resistant to rot and decay, making it perfect for outdoor use. You can build a simple frame using 4x4 posts and then attach pressure-treated floor joists.
Gravel is your friend: No matter which foundation you choose, a layer of gravel will help with drainage and keep your shed from sitting in water.
Step 2: The Frame - The Bones of Your Shed
Now, for the actual structure. We're talking about the frame that will hold everything together. This is where you need to choose your materials wisely.
Wood is good: For most lean-to sheds, pressure-treated lumber is your best bet. It's strong, durable, and resists the elements. You can use 2x4s or 2x6s for the walls and roof, depending on the size of your shed.
Metal is mighty: If you want a shed that's truly bulletproof, consider metal framing. It's incredibly strong and resistant to rust. You can find pre-fabricated metal framing kits, making the process even easier.
Step 3: The Roof - Keeping the Elements at Bay
The roof is the crown jewel of your shed. It's what keeps your stuff dry and your shed in one piece.
Shingles are the classic: Asphalt shingles are affordable, easy to install, and come in a wide variety of colors. They're a solid choice for most lean-to sheds.
Metal is modern: Metal roofing is incredibly durable and long-lasting. It's also more resistant to fire and wind damage. There are even stylish metal roofing options that look like shingles.
Don't forget the slope: Your roof needs to have a slope to allow water to drain. Aim for a minimum slope of 1/4 inch per foot.
Step 4: The Walls - Time to Get Creative
Now, let's talk about the walls. This is your chance to show off your style.
Plywood is practical: It's affordable and easy to work with. You can paint it, stain it, or even clad it with siding for a more finished look.
Cedar is classy: For a natural look, cedar siding is a great choice. It's durable, rot-resistant, and has a beautiful aroma.
Vinyl is low-maintenance: If you're looking for a durable, weatherproof material that requires minimal upkeep, vinyl siding is the way to go.
Step 5: The Finishing Touches - The Extras That Make It Yours
Now, let's add some pizzazz to your shed.
A door is a must: Choose a sturdy door that's wide enough to accommodate whatever you'll be storing in your shed. You can go with a standard hinged door, or get creative with a sliding door.
Windows bring in the light: A small window adds natural light and ventilation to your shed. It can also add to the aesthetics.
Lighting is key: Don't forget about lighting! Install a light fixture on the ceiling, or even run an extension cord for a portable light.
Tips for Success:
Measure twice, cut once: It's a classic saying for a reason! Take your time and make sure your measurements are accurate before you start cutting lumber.
Don't be afraid to ask for help: If you're not comfortable with some of the steps, don't hesitate to ask a friend or family member for assistance.
Take your time: Building a shed is a project, not a race. Enjoy the process and don't rush things.
Now, Go Forth and Build!
Remember, building a lean-to shed is a rewarding experience. You'll have a sense of pride knowing you built something with your own two hands. And you'll have a cozy space to store all your treasures!
Bonus: Beyond the Basics
Ventilation: Add vents to the walls or roof to prevent moisture buildup.
Insulation: If you plan to use your shed in the winter, consider adding insulation to the walls and roof.
Painting or Staining: Protect your shed and enhance its look with a coat of paint or stain.
Final Thoughts:
A lean-to shed can be as simple or elaborate as you want it to be. With a little planning and effort, you can build a durable and functional space that will serve you well for years to come. Now get out there and start building!
Sign up here with your email
ConversionConversion EmoticonEmoticon